Your tile grout has a limited eight to sixteen-year lifespan, so it doesn’t stay forever. Thus, you will eventually have to deal with ideas of how to remove tile grout. Having tiles makes life much easier because the impermeable tile surface does not collect dust, pollen, or pollutants. Grout is essential here because it fills in the gaps between tiles, keeping them from slipping over time and lowering the likelihood of cracks around the borders. Understanding the role of grout in maintaining tile integrity will reassure you that you’re making informed decisions about your home.
Depending on the technique you use, grout removal will need significant effort. Generally, it is applied smoothly and expertly in your home, ensuring no gaps or air pockets by spreading it uniformly. When removing pre-existing tile, the grout must be the most challenging part. Thus, removing it will probably take some effort, whether you’re considering renovating a kitchen or bathroom.
Fortunately, there are several ways to accomplish this, and with the correct tools, you can complete the task without breaking a sweat. We’ll guide you through the process, making it easy and manageable. Additionally, you’ll learn what resources are available to help ease the process, giving you the confidence to tackle this project.
Even the highest quality grout has a limited lifespan and will eventually deteriorate, necessitating replacement. Typically, grout can be removed from tiles in two primary ways: using a specialized or appropriate DIY tool. Be cautious, as removing grout can potentially damage tiles or other surfaces.
It is often best to remove old grout to create a solid base for the new grout layer. Consult an expert to determine the best action to avoid new issues. However, if you choose to do it yourself, you can follow the methods below to remove tile grout effectively using the right tools.
During the process of grout removal, there are a few things that you should keep in mind regardless of the type of tool you are using to ensure your safety. ALWAYS ensure that you have the safety gadgets on you.
It is essential to take your time when planning because grout removal can be a laborious operation.
Using a utility knife to remove wet grout is a straightforward task. Align the tool with the tile at a 45-degree angle. To cut through the grout, apply steady pressure and rotate the blade in a sawing motion back and forth, being careful not to harm the nearby tiles.
It’s not required to eliminate every bit of the old grout. You merely need to clean the loose places and remove some of the old grout when you regrout. However, this DIY technique of removing tile grout will only work if the work is too little, which you can do with this knife. This method is sometimes used in addition to the process mentioned below for the little left-out grout.
Grout in narrow spaces is best removed manually using tools like joint scrapers. Ensure the tool you use has a carbide blade or tip. Insert the tool’s head into the joint and remove as much grout as possible without damaging the adjacent tiles. Some grout scrapers come with multiple blades, allowing you to adjust the width of the groove opening.
To use a grout scraper effectively:
Bonus Tip: To start softening the grout, spritz it with water. One gallon of boiling water and one cup of sugar can also be combined. This concoction will make the grout softer so you can clean it off.
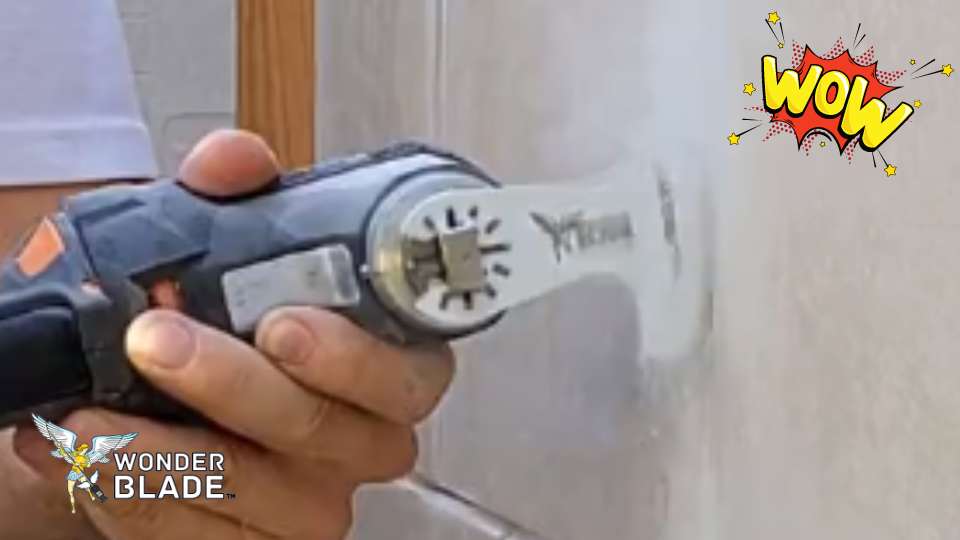
The most effective method for grout removal is using an oscillating multi-tool with a diamond blade specially manufactured to remove tile grout. Usually, this tool is equipped with a sharp segment saw blade for accurate work in tight spaces. Remember to put on safety eyewear, fasten the blade guard, and take the following steps:

*Save yourself time, money, and hassle with the best diamond oscillating tool blade in the industry for cutting through grout seamlessly!
Remember that this tool offers accuracy, speed, and grout removal without damaging the tile; however, the grout is far more pliable than the tile. If you push too hard, you can break the tile because you won’t be able to maintain the direction of moving, which usually happens for beginners. Thus, proceed cautiously and focus on the blade while working.
Bonus Tip: Regularly vacuum the grout joints with a vacuum as you work. This facilitates material removal from the joints and improves your field of vision. It also lessens the amount of waste in your workspace.
Several factors impact the cost of regrouting your shower, primarily labor and materials. On the other hand, the price range for replacing grout in April 2024 is $15.93 to $31.41 per square foot.
If we take the example of regrouting your shower, the average reported cost for professional regrouting is around $900, but expenses can range from as much as $2,000 to as little as $100 if you opt for a DIY approach.
If you’re not experienced, regressing yourself may take several days. Regrouting is a time-consuming task that can save you a lot of money if you do it yourself. On the other hand, professional grout repair and regrouting services can frequently be finished in a few hours. However, the cost of labor to reroute a shower varies depending on the project’s intricacy and location. The total price will be more excellent if your project requires extensive grout removal or significant tile repair.
Grout fills in the crevices between tiles and serves as a binding agent. Grout is more likely to be why your tiles look different after a month versus a decade. Likewise, it’s essential to produce a seamless tile appearance. However, grout needs to be maintained in some way to keep it looking clean and well all year long. There will be times when you can successfully perform maintenance, and there will also be occasions when you may need to remove something to replace it. Understanding and knowing when to remove the tile grout will save you a lot in decision-making and will help you move to the next stage of how to remove tile grout.
Mold and mildew are fungi that thrive in damp, gloomy places, as they are close relatives. In most cases, mildew will seem lighter, almost grey. Since your tiles will be utilized with water splash, they will be subject to prolonged wetness, which might promote mold and mildew. Mold and mildew, as uncomplicated as they may be, detract from the aesthetic value of your property. In addition to lowering the value of your home, they give off an unclean and unappealing vibe. For this reason, the old grout may be moldy and unclean.
With proper maintenance, tile flooring can last for up to fifty years. Regular cleaning can help maintain its appearance and extend its lifespan, but eventually, floors must be replaced. Additionally, you might be dissatisfied with your current tiles and consider renovation ideas that better match your home’s new interior and aesthetics. In such cases, removing and reinstalling the tiles may be necessary to achieve the desired look and functionality.
If the grout is cracked and dirty, it does not necessarily mean that you must remove all the tiles from the wall and begin the process from the beginning. Repairing the grout is quicker and more straightforward than replacing the tiles. However, to remove old tiles, it is frequently necessary to break the grout seal. Removing the old grout helps achieve a clean and level surface, which is essential for the ability of the new tiles to adhere to the surface.
Grouting serves the essential purpose of securing tiles, preventing them from shifting or cracking over time. However, if the grout is in poor condition, it can lead to water damage. This may be due to the grout not being sealed initially or the seal wearing off over time. Discoloration of grout, such as light-colored grout turning brown, can indicate deterioration.
Additionally, loose tiles or crumbling grout are signs that re-grouting is necessary. Many homeowners assume that if there are no visible issues with the grout, everything is fine, but it’s important to recognize problems early. Regular inspection can help determine when it’s time to remove and replace the grout to maintain the integrity of your tiled surfaces.
If you’re unhappy with the grout results shortly after application, acting quickly is essential. Grout typically needs 24 to 72 hours to dry, depending on factors like type, room temperature, humidity, ventilation, and application thickness. If you notice problems while the grout is still drying, you might be able to correct them. However, if the grout has thoroughly dried and you’re still dissatisfied, you may need to remove and reapply it to achieve the desired result.
Grout plays a crucial role in maintaining the consistency of tile sizes and protecting against moisture-related damage. Replacing old grout with new grout involves removing the old grout, cleaning the tile surface, and applying the new grout. While regrouting your shower might seem like a straightforward task that any homeowner can tackle, it does require careful attention and the right tools. Following this step-by-step guide can help you complete the job effectively, even with essential tools that are readily available.
However, removing tile grout yourself can be labor-intensive. Deciding whether to DIY or hire a professional should depend on the scope of the work and your comfort level with the task. Despite its durability, grout is susceptible to damage from frequent exposure to moisture and cleaning agents. Typically, shower grout lasts between eight to sixteen years, depending on various factors.
Whether you choose to do it yourself or hire a professional, you can significantly extend the durability of your tile grout by taking proactive measures. Regular maintenance is critical—scrape and clean the grout frequently and mop the area at least once a week. Cleaning the shower after each use can save you from the hassle of scrubbing tough stains later. If stubborn grout stains or dirt buildup persists, consider using one of the many specialized bleach alternatives available.
By staying on top of maintenance, you can ensure the longevity and quality of your grout, keeping your tiles in excellent condition for years to come.
Regrouting is a quick, affordable solution for little repairs and style changes. Retiling provides a long-term solution and is preferable for severe damage or a complete design modification.
Make your choice based on the intended scope of the renovation and the condition of your tiles. The price of re-tiling or regrouting varies greatly.
Epoxy grout is highly recommended for grouting due to its water resistance, stain resistance, and durability, making it perfect for high-moisture areas like kitchens and bathrooms.
You must use the appropriate solvent and scrubbing techniques to remove the epoxy grout from tiles. In contrast, the most effective method for how to remove tile grout made up of other materials is to use an oscillating multitool with a diamond blade.
Submit your questions, thoughts, or concerns to help us make better content just for you: