Homeowners need reliable defense against external elements, and siding is integral. James Hardie stands out as a premier fiber cement siding brand in North America with stunning finishes to meet any homeowner’s aesthetic requirements. It is widely recognized as an industry leader due to its products and the comprehensive installation guides it provides to assist contractors and builders in installing their products correctly. However, if you are short on time and prefer not to wade through extensive documentation, this article offers a comprehensive, easy-to-follow, step-by-step guide on how to install Hardie siding. You have already decided to install Hardie Siding to protect your house from freezing temperatures, seasonal shifts, snowfall, and ice accumulation. The next step is to install it correctly.
This guide outlines best practices for installing Hardie products. Certain situations may necessitate additional tools or advice. To make the installation process seamless, read on and follow the guide.
HardiePlank® lap siding from James Hardie is available in various styles and textures, with ColorPlus® finishes that provide added durability and aesthetic appeal. This fiber cement siding has widths from 5 1/4 to 12 inches and lengths up to 12 feet, making it ideal for regions with freezing temperatures, seasonal shifts, snowfall, and ice accumulation. The HZ5® product line, specifically engineered for such climates, offers enhanced paint adhesion and water management with a built-in drip edge to handle moisture more effectively.
What sets HardiePlank siding apart is its non-combustibility, resistance to moisture damage, and pest-proof properties, making it a long-lasting and low-maintenance option. Its climate-specific engineering ensures optimal performance based on local weather conditions, while the transferable, non-prorated substrate warranty provides peace of mind. With ColorPlus® Technology, homeowners can choose from various durable, vibrant finishes that maintain their appearance over time.
Installing siding correctly is essential to maintaining the highest level of protection, so you must pay attention to a few important installation recommendations. But, as covered in the next part, you will require a few essential tools before a guide to how to install Hardie siding begins.
Tools are essential because they are all necessary for proper installation and to keep you safe while working. The items listed below are what you’ll need to start and finish an installation successfully.
You may see what you can plan and go with based on your requirements. Proceed to the next installation steps if you have adequate tools.
The installation is divided into different stages, which will further ease the process of installing your siding. Follow the steps in each stage below.
Proper surface preparation is critical for a successful installation.
Step 1: Install the vapor barrier (house wrap)
Whether your home has plywood sheathing or not, installing a vapor barrier is necessary to protect walls against moisture entering from outside and stop rot and mold growth in wall cavities. To ensure continuous protection for this layer of protection, ensure it’s securely fastened using staples or cap nails while also overlapping at seams correctly for seamless coverage.
Step 2: Mark stud lines.
With your pencil, marker, or chalk line, mark out where your wall studs are on the vapor barrier. This step is important because Hardie siding should be secured directly into studs to provide optimal stability, particularly since boards of such weight require strong anchorage for anchorage purposes.
For HardiePlank® lap siding to be installed correctly and to have a drip edge at the bottom, a starting strip must be placed underneath the first course.
Step 1: Measure and align first.
Making starter strips is as simple as cutting entire or partial planks of HardiePlank siding into 1¼-inch pieces. Please ensure the starting strip is level before installing it at the base of the wall. This promotes even sitting on the first row of Hardie’s siding.
Note: The strip needs to be put over the water-resistant barrier, but there should be sporadic spaces left in the starter strip so that any moisture that builds up behind the siding can securely drain away.
Attach the strip in step two.
Step 2: Attach the strip.
Along the designated stud lines, hammer in the starting strip. Describe how the strip contributes to the overall protection of the wall by keeping moisture and pests from getting under the siding.
Now, the actual siding process begins.
Step 1: Set up the first board.
To ensure the initial board is straight, line it up with the beginning strip and use a level. To allow for overlap, nail the board into the studs about 1 inch from the top. Each board should overlap the one below it by at least 1 1/4 inches.
Step 2: Let the boards overlap.
Every board should overlap the one before it roughly one to two inches. Using a chalk line as a guide, ensure that every row is straight.
Step 3: Use the right nailing technique.
The board could get cracked or damaged by hand nails. Using a nail gun is critical, and the nails should be hammered into the studs about an inch below the top of the board but not too deeply.
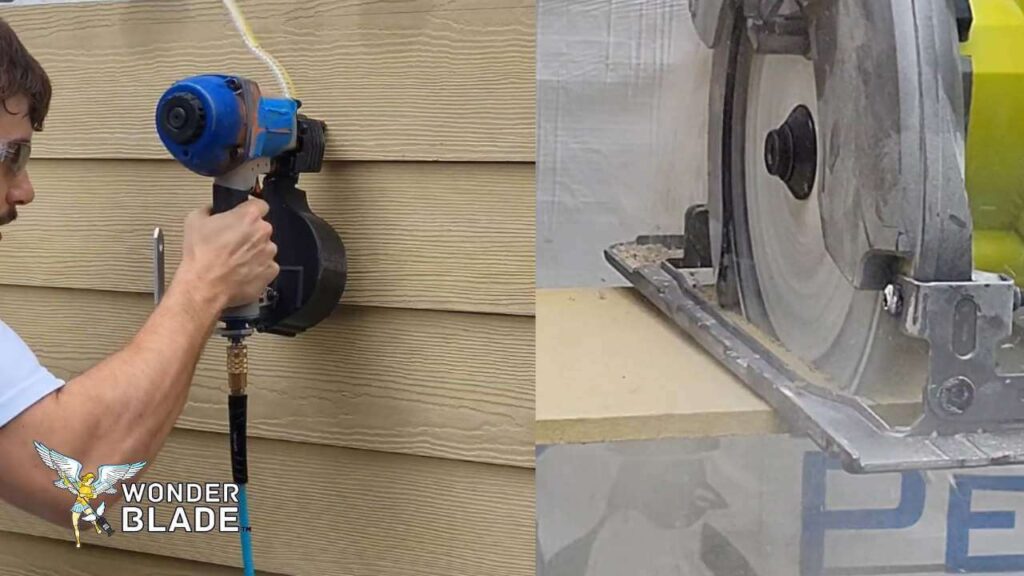
Step 4: Cutting boards for fitting with Hardie Saw Blade.
Use the Hardie Saw Blade and cut the boards to the correct size and fit them snugly around windows, doors, and other obstacles. Be sure to use appropriate dust control methods, as cutting fiber cement generates silica dust, which is harmful to inhale. You can use a dust-reducing saw with a vacuum attachment or wet-cutting methods.
Step 5: Give joints space.
Maintaining proper ventilation gaps at the top and bottom of each siding board is important to allow moisture to escape and prevent rot.
While installing the siding, you will run into tricky areas where it won’t be easy to install the siding. Follow the guidelines below.
Step 1:Installing corner trim
Put in corner trim boards before siding installation. These trim pieces give your house a polished, tidy appearance while providing the corners with more protection. It is recommended to use ColorPlus® finished trim or pre-primed trim to match your siding.
Step 2: Make adjustments for doors and windows.
Siding should be carefully measured and cut to fit around windows and doors, allowing a 1/8-inch space between siding and trim for movement. Fill up this opening with caulking to keep moisture out.
Note: Flashing around doors and windows is crucial. Put the appropriate flashing beneath the siding to divert water away from these weak points.
Step 3: Caulking joints and spaces.
To stop moisture from seeping in, caulk that is weatherproof and paintable must be used to seal any gaps and cracks. This stage guarantees the weather tightness and durability of your Hardie siding installation.
When using Hardie siding with ColorPlus® Technology, the boards arrive pre-finished, eliminating the need for extra painting. On the other hand, if you’ve chosen primed siding, paint using these procedures:
Step 1: Coat with primer.
Before painting, if the siding hasn’t been pre-primed, use an excellent exterior primer.
Step 2: Apply a premium exterior paint.
For optimal results, use an exterior paint that is 100% acrylic. For even coverage and long-lasting color, use two coats.
Step 3: Examine the completed installation.
Make sure all the siding is installed correctly, that gaps are sealed, and that there are no loose or misaligned boards by carefully inspecting the entire installation.
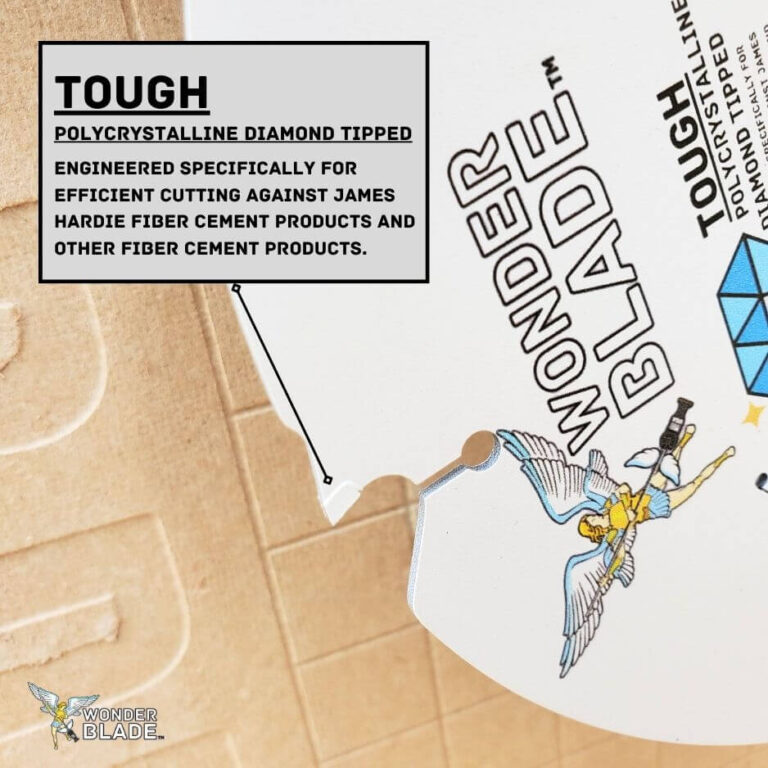
Using the Hardie SawBlade™ is recommended here for cutting the siding with optimal performance and safety. Unlike other blades, these are tailored specifically to fiber cement with diamond-edged carbide-tipped teeth designed for smoother cuts with reduced wear, creating cleaner cuts with less chips or splinters, leading to polished finishes every time.
The signature feature is its ability to produce larger dust particles, effectively decreasing respirable silica levels produced during cutting fiber cement. When combined with an M Class vacuum system or any effective dust management makes work sites safer and cleaner. Its 254mm version works great as an adjustable dust-reducing drop saw while its diamond-tipped version pairs perfectly with an 185mm circular saw for efficient dust reduction – offering durability and safety suitable for small- and large-scale projects alike. They also improve workplace productivity and safety while offering longer-term savings as an investment in cleaner cutting performance. Professionals looking to meet high safety standards while producing results of the highest caliber should make this wise decision
Due to their triangular shape, Gable walls require precise measurements and cutting, especially as the slope increases near the roofline. If you are looking for an answer to how to install Hardie Siding on your Gable walls, then you will need to follow a few additional considerations to ensure proper alignment and protection from the elements and secure the siding to provide a durable, long-lasting installation.
Precise Cutting: To match the gable’s slope, every siding board must be cut at the appropriate angle. Precise measurements guarantee that the siding aligns properly with the roof. For precision, use an angle finder or framing square and a saw blade made specifically for fiber cement to cut each piece.
Ensure Proper Ventilation: Airflow is crucial to avoiding moisture accumulation behind siding, particularly near the roof edge, which could otherwise lead to long-term growth of issues like rot or mold in damp or humid locations. Without adequate airflow, this could become increasingly likely and become problematic over time.
Drip Edge and Flashing: Installing flashing and a drip border at the roofline is essential for gable walls. Because gable walls slope, this will divert water from the siding and stop moisture from leaking beneath the boards, which is a common problem. Maintaining the integrity of the siding installation depends on proper flashing around windows, doors, and rooflines.
Nailing and Securing the Siding: When nailing Hardie siding into place, adhere to conventional best practices and make sure the boards are correctly overlapped and firmly connected to studs. Each component should overlap the one below it to form a continuous surface resistant to water. To ensure long-term endurance, choosing nails resistant to rust is suggested.
These guidelines will help you ensure that the siding on your gable walls is aesthetically beautiful and useful, shielding your house from the weather and enhancing its appeal.
Like the official installation guide, James Hardie has prepared its product maintenance guidelines, which you can follow. However, the essential information about product care is summarized below. Its longevity and performance will be guaranteed if these are followed.
The Hardie SawBlade™ comes with a WonderBlade™ Guarantee, which provides coverage for all defects and breakages. So, you don’t need to worry even if there is any problem with blade by any chance. Although, you can trust the blade’s durability and build, as it’s designed to perform under the most challenging conditions. So, whether you’re working on a large construction project or small DIY task, you’ll always have a peace of mind when using the Hardie SawBlade™.
In addition to providing extraordinary blade performance and defect Guarantee, you will also receive a free and fast delivery. This means, you will get your hands on your own ToughGrit™ Diamond Blade in a quick time without delays. Subsequently, this type of convenience is extremely valuable for professionals who need to meet deadlines. Meanwhile, getting a free delivery with no charges is always like a wish come true.
Leading fiber cement siding company in North America, James Hardie, is renowned for its gorgeous finishes, thorough installation instructions, and DIY advice. This siding is well-known for being pest-proof, non-combustible, and resistant to moisture damage, making it a durable and low-maintenance choice.
You will need safety gear and a few other tools to install Hardie siding correctly. These items are readily available on Amazon and necessary for safe and proper installation. Surface preparation, installation of the vapor barrier, installation of the starting strip, installation of the Hardie siding boards, and management of challenging regions are some of the steps that make up an installation. After installation, it requires the recommended maintenance, so following the discussed advice will help you maintain it for many years.

So, next time you’re cutting Hardie Siding or Fiber Cement Materials in bulk, save time and hassle with the right blade that can cut this tough material over & over again efficiently!
Submit your questions, thoughts, or concerns to help us make better content just for you: